When you resize a blueprint, adjust a digital illustration, or solve a geometry problem, the math has to stay consistent. Constructing shapes with a given scale factor keeps proportions accurate while changing the overall size. Without it, a triangle might look like a random polygon, a floor plan could make rooms impossible to fit through a doorway, and math assignments lose their geometric meaning. Scaling correctly means every angle, side ratio, and spatial relationship stays exactly the same, just bigger or smaller.
What does it mean to construct a shape using a specific scale factor?
A scale factor is a single number that tells you how much larger or smaller to make a figure compared to its original version. If the factor is 2, every side doubles in length. If it is 1/3, every side shrinks to one-third its original size. The process is not just about guessing new measurements; it requires multiplying each coordinate, side length, or grid unit by that exact factor while keeping angles unchanged. This method appears in technical drafting, architectural modeling, and middle or high school geometry, where preserving similarity between two figures is the goal.
You will need this skill whenever you have to reproduce a figure at a different size without distorting it. Engineers scale prototype drawings before manufacturing parts. Game designers enlarge character sprites while keeping the proportions recognizable. Students use it to solve similarity proofs and to prepare for standardized tests that require precise diagram construction. In everyday terms, it is the difference between a resized photo that looks sharp and one that looks stretched.
How do you actually draw a scaled version of a shape?
Start by identifying the original measurements and the required scale factor. Write down each side length or vertex coordinate. Multiply every dimension by the factor, keeping signs and directions consistent. Plot the new points and connect them in the same order as the original figure. For a rectangle with a 4 cm base and 3 cm height scaled by a factor of 1.5, the new base becomes 6 cm and the new height becomes 4.5 cm. Draw those new sides, verify the corners match the original angles, and your scaled shape is complete. If you want a clearer visual breakdown of the foundational steps, this guide walks through the basic multiplication and plotting process without skipping steps.
Why do students and designers make mistakes with scaling?
The most common error is applying the scale factor to only one dimension. Multiplying the width but forgetting the height stretches the shape into a distorted form that loses its similarity. Another frequent slip happens when mixing up enlargement and reduction. A factor less than 1 shrinks the figure, but people sometimes multiply by the reciprocal instead, accidentally making it larger. Working on paper also introduces measurement rounding. If you round a calculated 4.33 cm side to 4 cm, the angles will not line up properly when you close the shape. Keep decimal places consistent until the final drawing step, and double-check each multiplication before transferring it to the page.
Does changing the scale factor change the shape’s area and perimeter?
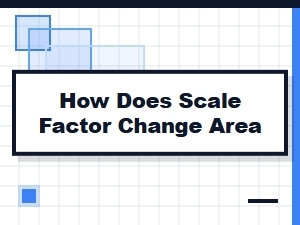
Yes, and the math behind it often trips people up. Perimeter scales linearly, meaning you multiply the original perimeter by the exact same factor. Area works differently because it measures two dimensions. You must square the scale factor to find the new area. A triangle scaled by 3 will have a perimeter that is 3 times larger, but its area will be 9 times larger. Understanding this relationship prevents errors when calculating material costs, paint coverage, or land measurements. If you want to see how the math shifts across different polygons, this page breaks down exactly how area responds to different scaling ratios. For additional geometric definitions on similarity and scaling rules, you can reference MathWorld’s documentation on similar figures.
What tools or methods make this process easier?
Graph paper removes most guesswork. By counting squares for the original figure, you can count the same grid units multiplied by your factor to place new points. Digital drawing programs use coordinate scaling, which handles the multiplication automatically but still requires correct input values. A compass and straightedge work well for geometric constructions when you need exact proportional segments without relying on rulers. Practicing with structured problems builds speed and accuracy, so you might try a grid-based practice set to reinforce the visual connection between multiplication and plotted points.
Quick checklist before you finalize your drawing
- Write down the original side lengths or vertex coordinates.
- Multiply every dimension by the exact scale factor, keeping the same sign direction.
- Verify that corresponding angles remain unchanged.
- Check that all sides use the same decimal precision before plotting.
- Measure the finished figure against the calculated values.
Start your next practice session by choosing a simple polygon, applying a fractional scale factor like 0.75 or 1.25, and comparing your result to the original. Keep a notebook of side-by-side sketches to track how proportional changes look on paper versus on screen.
 How Scale Factor Changes the Area of a Shape
 Scale Factor Practice Problems for Basic Geometry
 Practice Scaling Shapes Using a Grid Worksheet
 Solving Scale Factor Word Problems in Real World Contexts
 Word Problems for Scale Factor and Enlargement
 Scale Factor Word Problems with Fractions Worksheet